Showing posts with label The Cut Shoppe. Show all posts

Chill Out

Tuesday, September 24, 2019

Hey there! I'm sharing this project on The Cut Shoppe blog today. It features the Chill Out cut file. This is such a fun cut file and it can be used in so many ways. I could have used it for a page about my son reading, or my other son making a mess with his toys. Nope, not this time. Today I used it for a page about ice cream. Get it? Chill out!

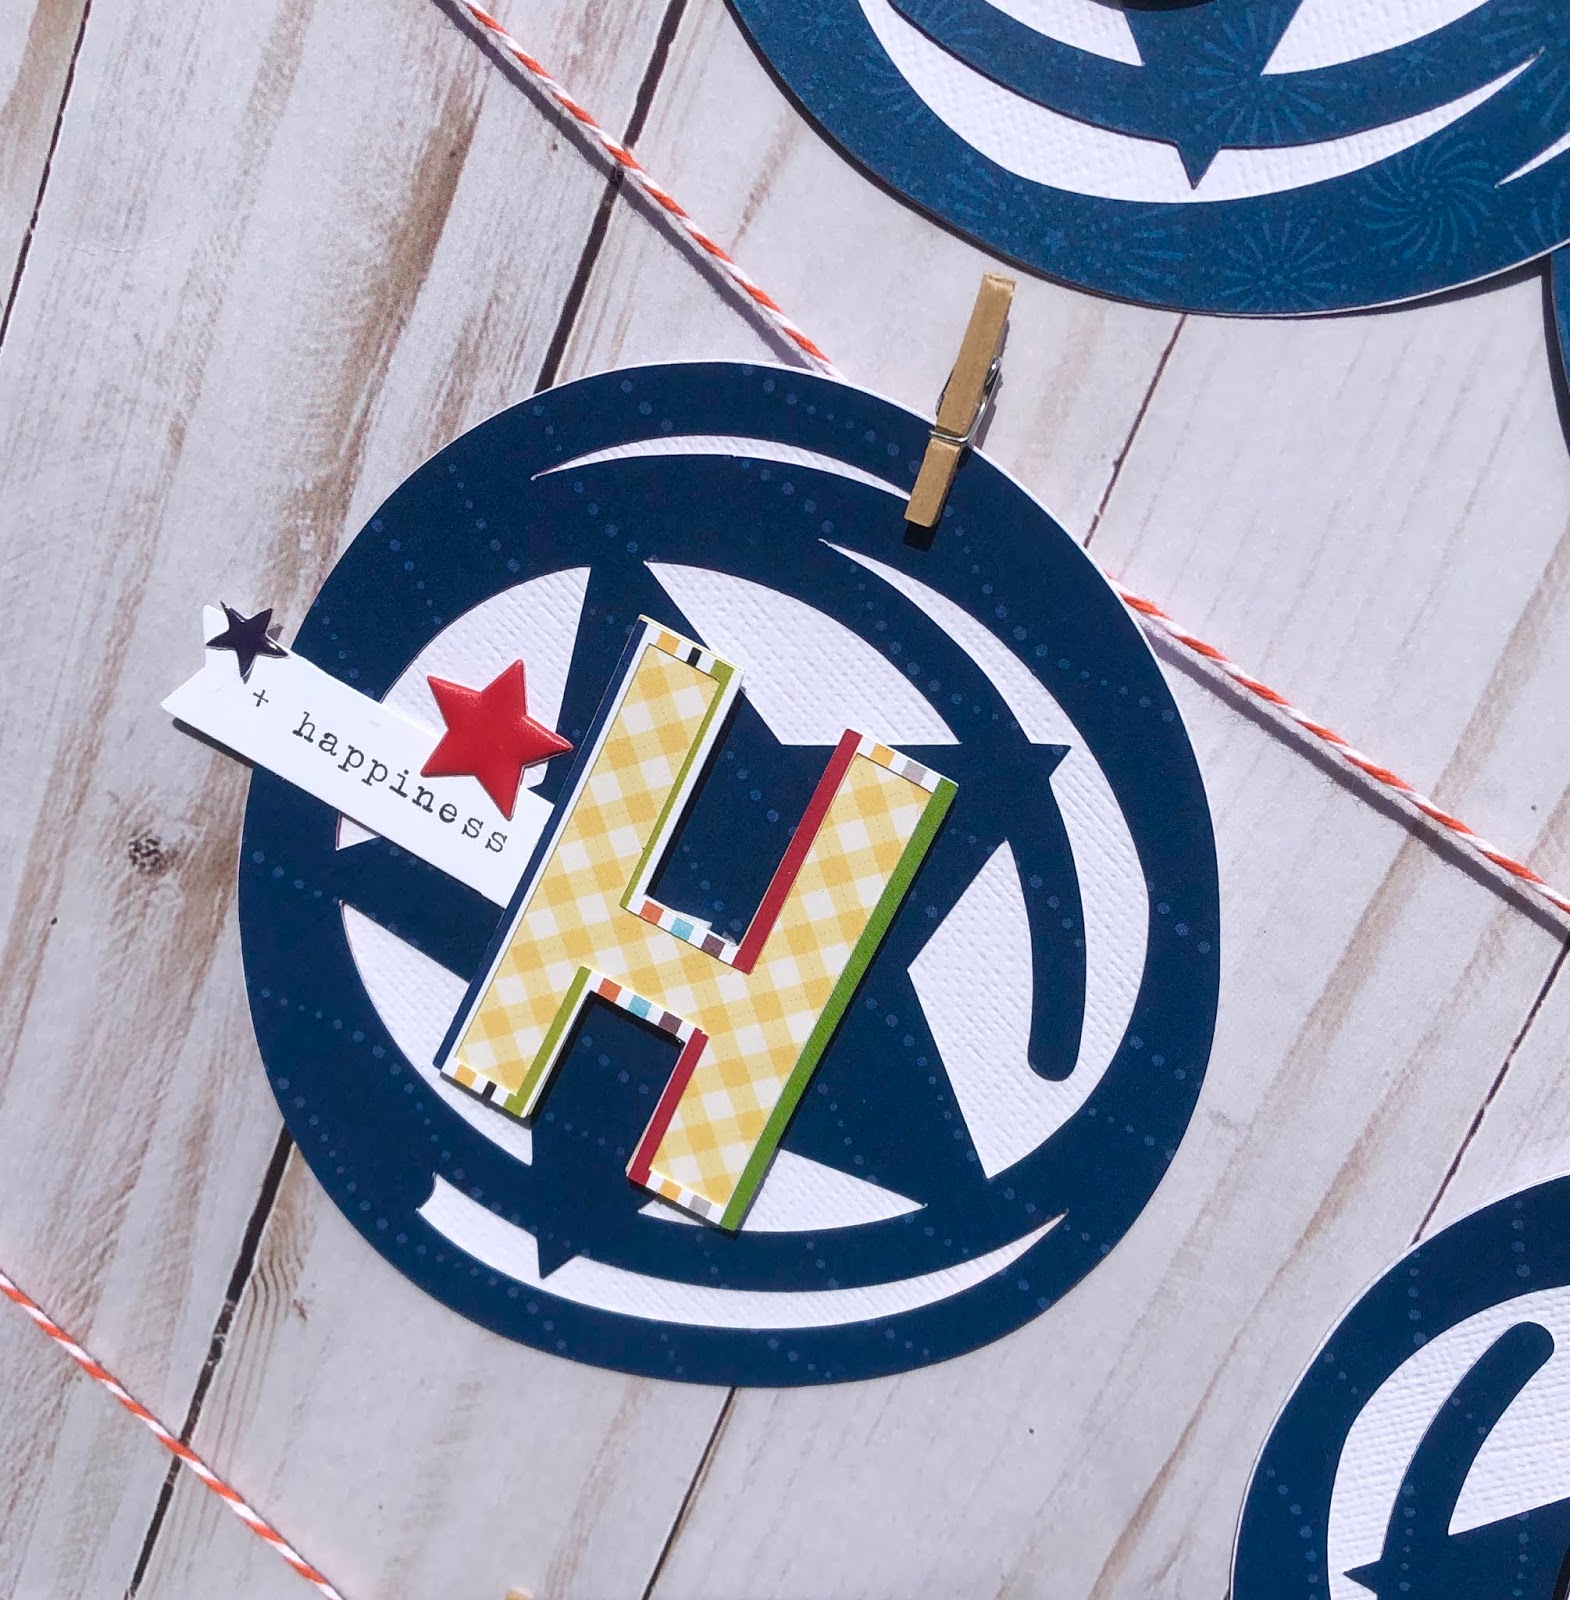
The hard part for me was deciding how big to make the file. The bigger the file, the smaller the photos. I also didn't want to cover it up, I wanted it to stand out.  Cutting it out of dark paper, backing it with light paper helped do just that.  I was able to trim the photos before tucking them underneath. I love using large cut files like these. I don't have to add a lot of embellishments. Just some stickers, and a few pieces of A Flair for Buttons flair and it's done!

Going out for ice cream is a given in the middle of summer when it's super hot out. It's extra special though to go out to Basking Robbins with Papa and Grammy. It reminds me of going out with my grandparents when I was young. 


Thanks so much for stopping by my creative view today. Head over to The Cut Shoppe to get this and so many incredible cut files! See you again soon.


Pool Side

Saturday, August 31, 2019

Hey there and Happy September! I'm starting the month sharing this layout on The Cut Shoppe blog today. I used the Pool Side cut file that was featured in the July 25 newsletter. 

I loved this cut file when I saw it, but had to wait to use it! Our vacation was at the end of the summer. I was writing down ideas the whole time and the day after we got home I made this layout. 

I decided to slightly tilt the cut file so I could put the photos on an angle as well. Setting the photo on lighter, brighter colors than the dark navy of the cut file created balance throughout the page.


Thanks so much for stopping by my creative view today. Come back again soon to see what else I have going on. You can also catch more of my projects on Instagram @thebeachygal

The Cut Shoppe newsletter comes out twice a month. Cut files included in the newsletter are only available in the newsletter. Subscribe now so you don't miss out on the next one!


Never Act Your Age

Saturday, August 24, 2019

Hey there! I'm sharing this project on The Cut Shoppe blog today, It features the On A Roll cut file.  I've wanted to use this cut file for a while now, but just coudn't pin down an idea for it. Until now. 

I wanted something fun and whimsical for some Disneyland photos. This cut file is perfect. I did a few things to it though. First I cut out the pieces. Then I went back in to design mode and moved the pieces away from each other in order to create more space. Then I used the offset tool to cut the stitch lines. As a bonus, with all the patterned papers I used, the extra space works in my favor. Next, I want to make a pizza with this cut file!


Sometimes you need to go do something fun, where you can be silly, laugh and just do what you want. This is my sister and I doing just celebrating her birthday at Disneyland.


Thanks so much for stopping my my creative view today. Come back again soon, I have more to share. 


Sea You Soon

Thursday, August 8, 2019

Hey there! I'm on The Cut Shoppe blog today. I'm featuring the new Sea You Soon cut file on my project. But I gotta tell ya', it has nothing to do with the ocean or Sea!


Well, here's the scoop. I live in the Seattle area. Sea is the abbreviation for Seattle as well as the airport call sign. So, I did a play on words creating a page of a recent trip to Pike Place Market!

What to do for a background for this page had me stumped. In the end, white cardstock won out, but with some watercolored splotches painted randomly. I still wasn't sure how this would turn out....

I cut the design out of a dark patterned paper, then backed the SEA with one color and the other 2 words in another. I love the way the SEA stands out. Next, I trimmed the photos before tucking them behind the letters. Lastly, I grabbed some embellishments from Shimelle Sparkle City. They are pretty perfect. Coffee, birds and a city scape with a ferris wheel. I couldn't have put this together any better if I tried.


My family decided to do a summer bucket list this year. We hadn't been down to Pike Place Market in a few years. It was a gorgeous day, there were lots of people and we checked this off our list.

Thanks so much for stopping by my creative view today. Come back again soon. I have more to share. 


Where the Wild Things Are

Thursday, July 25, 2019

Hey there! I have a project on The Cut Shoppe blog today featuring the brand new Photo Album cut file. I kinda have a thing about frames right now and couldn't wait to use it!


This cut file is made for multiple photos, which is exactly how I used it today. We took a ridiculous amount of photos at a recent visit to the zoo. I chose 4 of my many favorites for this layout. First I cut the file out of a darker Crate Paper patterned paper. I backed all the frames where I was adding photos with the same 2 patterned papers.  I decided to embellish the center frame, so used another paper for that one.

I love having the extra space beneath the photos! I embellished the frames in a few ways. Clusters, sentiments, labels.. the possibilities are endless.


We always do something fun for my son's birthday. This year was our first trip to the zoo. It was a beautiful day, the animals were active and we all had a great time.


Thanks so much for stopping my creative view today. Check out all the new cut files in The Cut Shoppe today! See you Again soon!


Home Sweet Home

Tuesday, July 2, 2019

Hey there! I'm  sharing this layout on The Cut Shoppe Blog today. I used the Mid Century Modern cut file. Don't you think it's perfect for a photo about a home? I do! I came across this old photo of me in my first apartment. All I could think about was this cut file.

I really like layers on my pages. paper, embellishments, all of it. I wanted to layer the cut file, but didn't want to back it with other papers. I found if I used the 'offset' feature on the Silhouette, I could create an edge to place around the cut file. This gives it the appearance of layers!

Pairing cut files with the right papers makes all the difference for me. In this case, Pink Paislee Auburn Lane had the right vibe. It's part fall, part family, part cozy at home. This page is everything I wanted it to be.


Thanks for stopping by my creative view today. I have a lot going on and a lot to share. If you can't find me here, you can find me on Instagram @thebeachygal.  See you again soon. 


You can find this and all o the awesome cut files in The Cut Shoppe


Welcome Home

Wednesday, June 19, 2019

Hey there! I have a fun project to share on The Cut Shoppe blog today.  I wanted to make my son came feel special when he arrived hime from his first year in college.   I used a couple of cut files to create a cool banner!

As I've already mentioned, I love using products in different ways. No standard banner shape for me today!  I used the star from the Boys Rule cut file to create the base. I backed it with white so it could be seen better. The Open Letter Alpha is one of my favorite fonts in the shop. It's so whimsical and perfect choice for me here. I added family and home sentiments from my stash to lightly embellish each piece. This was fun and easy and now hangs in our kitchen!


Thanks so much for stopping by my creative view today. I have a lot going on so come back again soon!


Take 3

Saturday, June 1, 2019

Hey there! Happy June! I'm up on The Cut Shoppe blog today sharing this project I made using The Big Screen cut file.

I love a good grid and thought it would be fun to create one using the film strip. I cut it 3 times, removing the word "action" afterwards, then I flipped them vertically. I thought about filling one of the squares with my photo, but what fun would that be.  Instead I backed the squares with pattern paper, and placed my photo overlapping two of the filmstrips. The rest was easy! A few embellishments fill some of the squares and I was finished. 


I think it's fun to use products in fun and different ways than they may have been intended. I challenge you to do the same! Share what you make with us in our Facebook group

Thanks so much for stopping by my creative view today. Come back again soon to see my next project!


Summer Is Coming

Friday, May 24, 2019

Hey there! I'm up on The Cut Shoppe blog today with this project featuring the Summer is Coming cut file.


I cannot begin to tell you how much I love summer. Let me tell you, signs of summer are everywhere! One of my favorite things to do when its warm is to sit in the backyard in the morning, drinking coffee while listening to the birds sing. So this cut file is perfect!

I used AmyTangerine Stay Sweet papers to cut and back the file. I love using patterned paper to cut and back files! I added an extra strip of paper behind the line to add more color. My photo fit nicely tucked over and under some of the letters. I really love when a cut file is a little bit of everything: title, focal point and embellishment. It makes a layout come together so easily.

Of course my finishing touch is A Flair for Buttons. They add a bit of dimension and tie all the colors together. I used the Hello Spring and Watercolor Designs 1 today.


There you have it. Thanks for stopping by my creative view today. I have so many ideas and not enough time. Come back again soon to see what's next on my list!


Slice

Thursday, May 9, 2019

Hey there! I'm up on The Cut Shoppe blog today sharing this page I made using The X File. This is file that has been around for a while. I've never used it, but always wanted to. So here it is. 

I love circles don't you? They are so easy to use on layouts. They make everything happy! This cut file has the added bonus of the X in the middle. I was thinking 'X marks the spot' kind of goes with my son's first time hitting golf balls with his Grandfather.  

Today I cut the file out of patterned paper from the Echo Park Good Day Sunshine collection. I decided to back only some of the circles. I didn't want it to look too busy. I like some of the open white space! I used a few embellishments to finish it off, including A Flair for Buttons flair. I love how this cut file is both background and embellishment too!


Thanks so much for stopping by my creative view today. I have more to share so stop by again soon!


Stay Mine

Friday, April 26, 2019

Hey there! I'm on The Cut Shoppe blog today. I used the new Shining Star cut file. I had so many different ideas in mind for it. I decided to keep it simple, combining it with Amy Tangerine Stay Sweet creating this soft but bright layout. Look how fun this is!


I knew I wanted to place my photo inside the star. In order for it to fit, I altered the cut file by removing the inner star before cutting. After cutting, I filled the spaces with several different patterned papers. I love all the different sized spaces! I embellished in a few areas, finishing it off with some tonal stitching, just to keep it interesting! This really is a very easy cut file to use. I may use it again with one of the other ideas I had!


This guyI hope he  is growing, learning and changing so fast right now. The one thing that isn't changing is how sweet he still is.  I hope he stays that way forever.


Thanks so much for stopping by my creative view today. I've got some things coming up some come back again soon. 


Think Happy

Thursday, April 11, 2019

Hey there! I'm on The Cut Shoppe blog today with this layout featuring the new Butterfly Wings cut file. To be perfectly honest, I wasn't planning on using it. I love this cut file. It's beautiful. My first thought was, 'but it's not me'.


Well, I sure proved myself wrong on this one. As soon as I got my hands on the Crate Paper All Heart, all I could think of was this cut file.  To me, the butterfly is inspirational. The papers are so feminine. They work harmoniously. Pink, flowers, butterfly. Boom. 

I used only patterned papers today. I cut the butterfly out of a small pink pattern, then backed it with 3 other papers. Varying the size of the patterns kept it from being too visually overwhelming.  I fussy cut a few flowers layering them over the printed ones, then added few stickers and sentiments, That's all.  Since the butterfly itself it the focus of the page, it didn't need much embellishing! It's too pretty to cover up anyway!


Thanks for stopping by my creative view today. Check out this file as well as this weeks new releases and so much more in The Cut Shoppe. Come back again. I've got ideas coming to paper soon!


Strut Your Stuff

Wednesday, March 27, 2019

Hello there! I'm on The Cut Shoppe blog today! This Pretty as a Peacock might be one of my favorite cut files ever. But when I saw it, all I could think of was stitching it.  So I did!


I didn't have a photo in mind when I started, but I like bright colors, so I started there with bright blues, greens and pinks. I also had the Strut Yourself flair from A Flair for Buttons.  By the time I finished sewing, I had the photo, and the rest of the product. Vicki Boutin Color Kaleidoscope arrived  just in time! I used the Chasing Rainbow paper behind the body of the peacock. I tried something new, using the WaterColor Markers  and also the Amy Tangerine watercolor set to fill in the feathers. The colors are beyond perfect. I definitely need some practice with the markers, but for a first try I'm really pleased with the results.


You can see more of the stitching in these detail  photos. Like I said, I like bright colors!


Thanks so much for stopping by my creative view today. You can find this and so many incredible cut files in The Cut Shoppe. See you again soon!


FREE BLOGGER TEMPLATE BY DESIGNER BLOGS