New for Me

Saturday, December 29, 2012

Finally getting a few minutes to myself. Ok, still multi-tasking.  Typing at the table while the little man eats lunch...Anyway, I'm starting early on my 2013 'resolutions', if you will. There are so many online scrappy places to play. I have many bookmarked, but haven't joined in.  I decided that I'm going to try one new challenge/sketch blog a month. I figure that puts no pressure on myself.  It might be more one month.  Who knows.  It can be overwhelming if I try to choose ahead of time, so I'm going to peruse the sites and play along when something strikes me.

That leads me to today.  I've been browsing at Sketches in Thyme for a while now, but have never joined in over there.  Well, now I can say I have, with not one, but two sketches!

The first is sketch #96.  This is a favorite photo of mine.  I've been struggling coming up with the right idea and this sketch was a great one!  A simple Bazzil CS matte, punched withe a Fiskars border punch and tied with random twine.  I used Queen & Co, Target, and some other washi tape on white CS then used an EK success punch to create the chevron-like strips.   I used some of the leftover punched out pieces to create the corner clusters, splattered a few different colors of Mister Huey and Tattered Angels mist.  A few yellow buttons to round out the yellow Doodlebug letters and I had the LO I was imagining!


For this one I used sketch #97, but I converted it into a one page sketch.  I'm kinda washi tape crazy, so it's kind of appearing on a lot of my pages right now. Busy photos mean a simpler design for me.  But simple doesnt mean I cant use patterned paper!  I stuck to the 3 primary colors that stood out to me, red, yellow and blue and repeated them throughout the page.  I wanted to imitate the imagery of the balls going around and around, so I used circles where I could with the brads, 7 Gypsies tape, the blue tape and Stampology journal stamp.


Thanks Sketches in Thyme for inspiring me with some great sketches!


Child's Play Challenge: What's Under the Christmas Tree Blog Hop

Wednesday, December 19, 2012

Hi, and welcome to the Child's Play Challenge: What's Under the Christmas Tree Blog Hop.  If you did not get here from Ashley's Blog, please go back to Child's Play Challenges and begin from there.


One lucky winner will win:

Here's what you need to do to enter:
1-check out each blog along the hop and leave a comment
2-post about the hop on your blog
3-link your post on our special "Blog Hop" linky in the sidebar by December 31st
4-BONUS!! Create a layout based on any of the DTs inspiration items and post that link for a second entry!!


I'm glad you stopped by. I'm excited to show you the toy I chose, why I chose it and the LO to showcase it. Here is the toy:
Gears mean a lot in this home. They are a favorite of my younger son and have been for over a year now.  They go where he goes, even to bed with him.  Here is the page I created:

This Boy & This Toy


(I apologize for the poor photo.  It's been rather dark and dreary here in the Pacific Northwest. I will try again later today)  

It is an extremely busy page, mostly due the photo itself. It was taken in the dark on a phone, and well, there is a lot going on in that blanket of his...On this particular night though, it was completely necessary to take this photo.  He had been particularly attached to the gears this week. They went to and from school with him.  Well, this day they did not make it home from school and it was a Friday.  We was cranky, out of sorts and would not stop looking for them. I called his teacher, and she offered to drop them by on her way home.  I was out with my friends and received this text message with photo.

I find using pre-printed paper difficult, but wanted to use it here.  I took some of his gears and used them as a mask, spraying brown, blue and yellow mist.  I cut around one of the gears in the paper, then tucked the photo under it.  The top felt empty, so I cut out some gears from some Cosmo Cricket paper and made a small banner.

 It is not the first, or second page that I have created about these infamous gears.  I thought I would share the others as well.


Thank you for stopping by.  I hope you will come back again. If you aren't a follower, please join me on my creative journey.  Your next stop is Karen W's blog.  Hope to see you soon back here and over at Child's Play Challenges


Me @ Six

Monday, December 17, 2012

Well, Hanukkah is over. The good thing about Hanukkah being so early is it forces me to shop early.  As hectic as that can be, it means I have more time later in the month to relax and...scrap?

So yes, my guests have gone, the remaining gifts are wrapped and I went into my room to play!

This is what I whipped up.  I have to say I was very inspired by this months color scheme of black, red and silver over at Black with 2 challenge. These are colors I can work with!

I am also hosting this week's Weekly Challenge at Club CK. I chose a LO challenge of combining something old and something new, in conjunction with the end of this year and the beginning of a new one.

Knowing what colors I was using made it easy to grab supplies.  Black card stock.  When I first read the two colors, I knew I wanted to use my new Heidi Swapp mist and a new Crafter's Workshop stencil!  The color is called Tinsel and it's a super cool, opaque, shiny, SILVER!  I decided to use old photos.  All that was left was the color red.  I gathered paper scraps, old buttons and some bling and went to town...


I went a bit wild with the mist, but I wanted the silver to be visible. I like the way I created a diagonal line with it. It's a contrast to all the circles. It felt good to be scrapping! I'm happy with how this turned out!


Party Like a 1st Grader

Wednesday, November 28, 2012

Yep. 2 posts in 2 days.  I'm trying, I'm trying! It's all about Child's Play Challenges today.  A new challenge is up.  Inspiration was drawn from this photo


Toy trains under the Christmas Tree.  Ok, this one had me stumped.  My boys were not and still are not train boys.  I do not celebrate Christmas.  So I went with color inspiration on this one.  I didn't choose the photos until after I began which I never do.  I thought it was fitting that they were holiday oriented.  After that, the creativity began to flow.


I started with the colors: brown and green.  There was so much red in the photos, I decided to stitch a red "railroad".  While I was looking for embellishments, I came across these gold brad/gem stickers. Woo Hoo, a perfect addition!  They are shiny like the lights on the tree!  Well, if there is gold gems, there needs to be some glitter too. I glittered up some DIY Thickers then used a gold pen for journaling.  I love how this turned out.  Once again, completely enjoying the inspirations that comes from Child's Play Challenges. Come join in!

Supplies:
PP-Making Memories
CS-Bazzill
brads-MAMBI
Alphas-Thickers and Cosmo Cricket
Glitter-Martha Stewart
Punch-Fiskars
Pen-Sakura
Floss-DMC


A Tradition Continues

Monday, November 26, 2012

Ok, so I'm not blogging as regularly as I'd like, but at least I'm getting a post in here and there.  I'm finding this year it's hard to keep up with this.  I'm scrapping, just not posting.  I'll get caught up...eventually.  In the meantime, I do have a new page to share.

This LO started as a page kit from a class I took at CKC Seattle.  The papers were too busy for my taste, so I decided to use the reverse sides of the paper, then added a bunch of stuff of my own.  As I was working on it, I had an 'ah ha' moment.  Instead of the die cuts that came with the kit, I could make my own using a paper bag!!! Ok, well, I's been trying to come up with a way to create a LO for the Club CK Issue Challenge using brown paper bags.  I grabbed some mist and some stencils and placed them randomly over the writing and design on a grocery bag. I took those die cuts and traced them onto the bag, cut them out and used them to create the banner under the photo. I'm really happy with the result.


The papers and small banner are SEI.  The twine is doodlebug. I used both Mister huey and Glimmer mist, a Studio Calico and Crafters Workshop stencil.  October Afternoon and Thickers alphas, random buttons and brads.

Angry Birds Meet the Space Needle

Thursday, November 15, 2012

Yes, you read that correctly. Only in Seattle would you find an Angry Bird being shot off the Space Needle to promote the release of Angry Birds Space.  No, I am not living in the past, but I did just do a page documenting this!

You see, after we went to the Space Needle to see the Bird, I of course bought some themed paper.  This paper came complete with the Space Needle and the word "Seattle" on it.  Uh Huh, I hate it when I do that.  I have no idea how to use pre embellished paper so why did I buy it????  Thankfully for me, the latest *thought* at Thinking*Through*Design is using pre-embellished papers.  

I used a technique I learned about pre-embellished paper. Cut out some of the elements, add some pop-dot adhesive, and place them in the same place they were cut from.  It adds dimension and interest to an otherwise flat page.


I hesitated using these photos and paper together at all.  The sky in my photos is the same color as the paper.  I matted them on white card stock to make them stand out. I didn't want to take away from the photos or paper, so there really wasnt much else to do but add a title and journaling.   I found the logo and font on the internet, printed it and cut it out.  I decided to journal around the edge of the paper to frame the page.  I used a green pen to highlight the logo title.

So It wasn't as complicated as I made it out in my head.  I need to look at pre-embellished paper as less decision making, and therefore faster pages for me!

I hope you will join us over at Thinking*Through*Design!


20 minute Layout (more new things)

Tuesday, October 30, 2012

If you know me, you know I'm usually up for a creative challenge.  I find they spark my creativity anyway.  So, when I was recently presented with the 20 minute challenge- create a LO in 20 minutes or less, how could I resist?

I made this one first.  I was able to do it quickly because part of it was a kit I had prepared to take to a crop.  I love BoBunny's summer lines. I bought the chipboard too, but always forget to use it. Not today! I added a little banner and some washi tape clusters and that was it. done.


This one I did today for Club CK Issue Challenge, using vellum.  The card stock and PP were already together. (I had put them together for another project, then changed my mind).  I quickly decided on photo placement, then added the red doodlebug twine, Target and Queen & Co Trendy Tape, some random buttons & brads.   I used Lawn Fawn alpha stamps, then heat embossed the title. It took a little time, but I still made it in 20 minutes!


Thanks for the idea. I'll have to try that again!


New things!

I've been busy again....but scrapping this time!  I have quite a few Layouts to post, but for now I'll start with this one.  I will add more later.  I won't keep you, so here goes.


This next one is for both ScrapFit and Frosted Designs.  I used the sketch from ScrapFit, and the misting with stencils from Frosted Designs.
I'm thrilled with how it came out! I was stuck on how to do this photo. He CRASHED in the hotel room after being outside at the poo ALL DAY! I just didn't know which direction I wanted to take with the design and papers. Enter challenge blogs! The sketch was great. It was simple enough, but with lots of leeway to play and make it my own.   Well, mist  was a great way to make it my own!  Besides, mist seems to make an appearance on many of my pages lately. I love the variety of ways mist can change a page.   I used some bitty things as well as a banner. Sweet?  Maybe. He may be a boy, but there is nothing sweeter than a child sleeping.  

Papers are all MyMinds Eye. Banner chipboard is Basic Grey. Twine is also MME. Tattered Angels mist. Crafters Workshop stencil. AC buttons and paper flower, Doodlebug alpha stickers, Studio Calico stars. Beads are from Fred Meyer market!

Creating Keepsakes Nov/Dec Issue!

Tuesday, October 23, 2012

Well, today the new issue of Creating Keepsakes Magazine hit the news stands today!


Why is this important?  I contributed to this issue! Way back in January, I submitted an idea for an article. Much to my surprise, not only was my idea accepted, so was one of my layouts.

The article Thankful for You is the result, and my layout is on page 44.

(As seen in the Nov/Dec 2012 Issue of Creating Keepsakes magazine. Copyright Creative Crafts Group. Posted with prior permission from the publisher)

If you are interested in purchasing a copy, you can find a print issue here, and the digital copy here 
There is special online content and downloads available as well. You can find them here

Peek!

Wednesday, October 17, 2012

I'm so excited to share this LO today! It's time for the art supply challenge at Child's Play Challenges.

Googly Eyes!!!!

And I knew exactly what I wanted to do! (and NO, it isn't a Halloween page)  My younger son made up this game of looking under the door when he was about 3 years old.  All I could think of is PEEKing under the door or PEEK-a-boo, I see you!  (You know, eyes, see, PEEK). Oh, and he still plays this game today!

It's a simple page because it isn't a great photo.  I used Making Memories paint, to do the background colors. I chose green and blue to pick up the colors in both boys pajamas.  I matted the photo on some very old Basic Grey paper.  I only had one set of BoBunny chipboard eyes, so I used some random white buttons and threaded them with black floss to get the same look. A little doodlebug green twine wrapped around the journaling picks up the green again.  I inked the edges and hand drew the stitching to bring the focus in a little.

So I hope you will come check out this week's inspiration over at Child's Play Challenges!

I scraplifted this LO from the Sept/Oct Issue of Creating Keepsakes magazine.


Number of Photos Blog Hop

Thursday, October 11, 2012

Just wanted to post the winner of my giveaway!  
Congrats Becky!  Goodies are coming your way!


Hi there and welcome to the Number of Photos Blog Hop.  We need to get a little business out of the way first:  You should have arrived here from Colleen's blog.  If not, please go to Amanda's blog and begin there.

I procrastinated deciding on an idea for this blog hop.  I chose to work with 4 photos.  Part of me thought I should have chosen a different amount of photos to work with.  I like to use multiple photos on my pages, so regardless of number, it should have been easy for me and it wasn't.  Luckily, a topic and photo opportunity fell in my lap over the weekend.  The design and products fell into place rather quickly after that.
Here is my LO.

The photos are not really the story being told. They are the visual documentation of the story. They are actually the least important part of this page. They are bold, busy and out of focus, but I needed to use them. I knew I wanted to use the "day 1", etc with each photo. Journaling beyond that, I wasn't sure. I did have difficulty with a title, and am happy with what I chose, and where I placed it.  My favorite part are the balloons.  I added flock over them, then added Stickles to shine them up a bit.  I broke my cardinal rule of "leave well enough alone" by adding a bit of journaling at the last minute

There is more journaling, in fact there is a whole story. If you are interested in reading it, you can find it  on my other blog, Beach Girl At Heart

Thanks for stopping by.  I have a small giveaway.  Please leave a comment to be entered.  If this is your first time visiting, remember to become a follower as well.  Your next stop is Carolyn's blog.

Supplies:
PP-Sandylion
CS-random
Bazzill In stich'z template
DMC floss
Ink-Colorbox
Sassafrass and AC alphas
Souffle pen
Doodlebug flock
Stickles
MS glitter

Gutless!

Wednesday, October 10, 2012

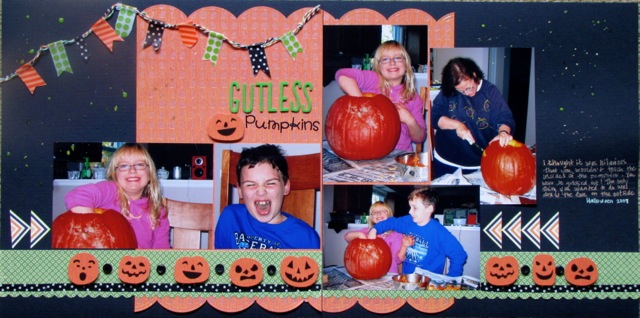
Wow, I have been in desperate need of some MoJo! I haven't had consistent time to scrap lately and it's really taken it's toll on my creative flow.  I try to browse scrappy sites and blogs daily, so I don't lose touch, but I guess it hasn't been enough.  However, while browsing, I found a challenge site called Black with Two.  Normally, I don't do well with color challenges, but this months combination of black, with lime green and orange was something I could work with!  I also have to say thanks to my friend csescrap13 who is hosting the weekly challenge over at Club CK. She posted a wonderfully  inspriring sketch by Scrapbook Generation that was my starting point!


There is nothing better for halloween photos than black, orange and green!  I think I did a good job with the colors and of limiting use of white.  I keep my Halloween stuff separated so it was easy to find what I needed.

I pulled out some SEI and Echo Park  PP. The Jacks were an SEI border that I cut and separated. Fiskars and EK Success scallop punches I think feel like the round ridges in the pumpkins. Some WRMK, Queen & Co, and Target washi tape flags on some Doodlebug twine ties it all together.  AC Thickers and Doodlebug letter stickers made the title.  Lately, I can't leave a page alone with out mist of some sort. Today I tried some Fireworks.  Not sure how I feel about it yet.  It is supposed to dry opaque, we'll see.  One of my favorite things?  Soufflé pens for the journaling.  They are so awesome for writing on dark paper and I don't use them that often.

Stars Shine Down

Thursday, September 27, 2012

Hey there! I have a new LO to share today, courtesy of thinking*through*design.  Today's thought is all about adding dimension to your pages.  Sometimes when I'm working on a page, it seems flat to me, like it needs some oomph. When this happens, I look for ways to jazz it up, ways to give it dimension.  Often, I've added pop dots under stickers and journal spots to give them some lift, Glossy Accents to stickers, to give them some shine.  Today I tried something different.

I had this piece of Fancy Pants paper that on it's own is bold and busy.  I could have added a photo and been done with it.  But it looked blah.  I had a few ideas to fix it up, give it dimension.  The first was to cut around some of the rays and raise them up with pop dots.  The next was to sew around the remaining rays.  The last was to cut out some of the stars so I could see the light blue cardstock I placed underneath.  I added Stickles to both the above and below stars.  In other areas, I added Studio Calico wood veneer stars covered in glitter. Now the page had some lift, and as I looked around the page, my eye saw the rays move.  The last few details to bring it all together were matting the photo on similar light blue paper, and using glitter Thickers for the title.


I wasn't originally thinking of using this paper for this photo,  but by making changes to the paper itself and adding all these elements, I made it work for a tribute to my Aunt.  She passed away a few weeks after this photo was taken.


Feet

Wednesday, September 19, 2012

Well, Good morning!  It's Board Game week at Child's Play Challenges.  This week's challenge is a good ole' everybody's favorite:


Here is my LO.  We were visiting my dad last summer.  One was bored, the other reading.  It turned into a foot fight. One was laughing, the other annoyed.  Isn't that a little brother's purpose? 


I chose to use the colors on the Twister wheel to highlight the photos.  (How much better could photos of feet go with this challenge?)   I added in some circle elements thru masks/mists and some journal spots.  I loved the Basig Grey PB&J papers, so I bought the whole kit!  The colors and patterns were great for this page.  The journal spots are also from the same collection. Mask by Creative Workshop, Tattered Angels mists, Bella Blvd alpha stickers and I was pretty much finished.  Sketch by Sketch Savvy.


I Dream of This

Friday, September 14, 2012

I'm beginning to feel like I have a scrappy process again and I'm getting in my groove.   I find when I've not been able to scrap on a regular basis, I need something to help get me started again.  It really helps right now to have some daily prompts coming from the BPC Big Idea Festival. The prompts give me something specific to focus on, which takes the stress out of "where do I start?"

Fortunately for me personally, the Day 3 idea, share a dream, coincided with this week's CK Issue Challenge, use cameras.   I have lots of dreams.  Some I can crete action plans for, others really are just dreams.  I wanted to create a page that shares an attainable dream. I want a Canon DSLR Camera and I want to know how to use it.  I told myself I need to learn to use my own camera first, but gave myself an end date of my birthday of next year.  Hopefully I can come close.

Camera overkill? Maybe.  There are lots of camera elements on the page.  That was part of the instructions from the day's idea.  Embellish your page with things that go with your dream.    I started with only Echo Park papers and stickers. I added one PP form Basic Grey, My Minds Eye Washi tape.  Little did I know how handy these little Studio Calico wood veneer cameras would be.  I was a bit skeptical when I got them.  A little journaling with the Souffle pen and some Colorbox ink around the edges and I was finished.

All Star

Thursday, September 13, 2012


Having some fun now and stepping outside of my box. Well really, I don't think I have a box anymore. But that's for another day.  I've had this photo sitting in various places in my scrap spaces since 2007!  I had it printed in 8x8 because I saw that Costco was printing new sizes. I wasn't sure what I would do with it, but I wanted to see what it looked like.  It's a favorite photo that my Dad took of my son at his All Star Sunday game.  Once a season, the farm league teams got to play on the big field with announcers. They make a big deal of it and the kids have a blast!

Well, today I made this page for BPC Big Idea Festival Day 7, use a large photo.  The photo is sitting in my scrap room no more!
I kept this one fairly simple.  A little white Mr. Huey mist on some red Bazzill CS. PP and embellies from EP Baseball mini collection.  I covered Jenni Bowlin chipboard banner pieces with washi tape by Target, Bella Blvd, and Queen & Co and hung it on MME twine.  Simple, but effectively leaving the photo as the focus.

bff

Tuesday, September 11, 2012

I am so happy that school has started.  No, it isn't because my boys were driving me nuts.  We actually had a wonderful summer together.  It's because I haven't had much time to scrap and even less time to keep up on my blogs.  I'm ready to get back to creating and sharing my work.  I might even begin to participate in some challenges again.

I began this LO yesterday, finishing it today. I was inspired by the BPC Big Idea Festival, Day 5.  May Flaum says to just be happy creating.  So I did just that.  The idea for the mists and masks came from ScrapFit.  I was browsing scrappy sites over the weekend and saw that was one of the challenges.  Mists and masks are one of my favorite things to do right now.  I can be free and jsut a little messy, but still be in control.  If I don't like it, I can cover it up or rotate the page. The idea of the 'rays' comes from Club CK Sept/Oct Issue Challenge #1.

I fussy cut the Fancy pants sun/star flipped it over and misted over it in several places using Mister Huey and Glimmer Mists. I let it all dry, then outlined 2 of the misted areas.  I fussy cut 2 more sections of PP adding them to the corners over some Bella Blvd tape.  The Aunthentique friendship sayings and individual words were a perfect addition to the page.  The blue added some contrast to the orange and yellow.  The title is an alpha stamp set by Lawn Fawn.  I filled it in with Twinkling H20's, the blue again as contrast.

I really had fun with this page.  One thing led to another, and it all flowed together.

The BIG Truck

Wednesday, August 29, 2012

This is my latest LO for Child's Play Challenges. Today's LO is based on this prompt.  The Toy Challenge.
Tonka Trucks.  Who doesn't know them and who doesn't love them?  My boys that's who.  Neither of them were ever "truck" kids.  Oh well.  So, I didn't have any photos of boys with trucks, but I was still able to create a fun LO.  I used a photo of the big, gigantic moving truck that showed up to our house when we moved from Chicago 2 years ago.


I had some fun with it.  I liked chevrons for this one, they have a movement feel to me.  I used big letters in red to stand out, like the big truck. A small banner of Washi tape, buttons and wood veneer stars, and the car wood veneers as well. A little splattering, to fill in some space and I was finished.

Please, go check out Child's Play Challenges.  I hope you play along!

Supplies:
PP- October Afternoon and Echo Park
Washi Tape-Queen & Co
Wood Veneer pieces-Studio Calico
Mist-Studio Calico and Tattered Angels Glimmer Mist
Twine-DoodleBug
Letters-Cosmo Cricket, Pebbles, Thickers

Two Little Fishies

Thursday, August 23, 2012

Good Morning!  I'm so happy I remembered to write (and post) about my latest LO for Thinking*Through*Design.  Today's *thought*--Mixing title fonts--is one I use often.  I love the look of small letters mixed with larger ones.  I like to mix colors, usually using the colors that are in my photos and/or papers on my page, which I did here.  I don't really pay attention to which style of fonts work with each other.  I just use my own eye ti decide if I like the way the fonts look together.  One thing I don't really like?   Mixing fonts within a single word.  I probably should have tried that for this *thought*, but I would have struggled and forced myself into something I know I don't like to do.

I used a BoBunny chipboard piece with the word 'two' on it.  I liked the orange that grabbed the orange in the stripe in the middle photo and also pulls the coral in the Quick Quotes PP on the left.  The green Sassafrass letters work with the swimsuit in the bottom photo and the small AC letters are light blue to bring it all together.  I used some mist and a circle mask to mirror the pool water, some gems for dimension.  I just liked how the larger circles that are outlined in Stickles, helped moved the eye into the photos.

It's 5 o' Clock Somewhere...

Tuesday, August 21, 2012

I am really out of my groove.  It's summer.  Happens every year.  More time spent with my guys means less time for me.  That means less scrapping!

Last week, I missed my first CK Issue Challenge all year!  I was determined not to make it 2 weeks in a row. I squeezed in a bit of time today to get it finished.  I found this week's challenge, use clocks on my LO a real challenge!  Clocks are not an element that ever cross my mind to use.  I searched everything in my stash and found nothing!  No stickers, stamps, nothing!  I did come up with an idea for a page easy enough, so I just drew the clock into my title.  I was able to play along with the August Sketch it Out at Ck with this LO as well.

I kept it pretty simple, mostly due to limited time, but I like the way the yellow and black work together to highlight my photo.  The clock in the title works well too.


This is how I Roll

Tuesday, August 7, 2012

Hooray!  I've been busy scrapping, but no time to play on my computer to share my creations.  Play I say?  This is my first reveal for Childs Play Challenges.  My prompt is "Oh the Places You'll Go", by Dr. Seuss.  I saw the possibilites in these photos of my son using his walker to get around.  I used the the title of the book in my journaling.  Because really? Oh the places he can go now that he is mobile....
I used this new American Crafts PP. The arrows mean movement to me.  The blue "road" strips are cut from another PP from the same collection.  I drew the wavy line freehand then stitched over it, added the Studio Calico wood veneer bicycles.  The title is Thickers and CosmoCricket Tiny Type letters.

I think this is fairly simple, but very meaningful.  Thanks for stopping by and please go check out Child's Play Challenges!


An iPhoto Tutorial: Creating multi-photo prints!

Friday, July 20, 2012

During a recent trip to the Apple Store, I was able to get my most frustrating iPhoto question answered:

How can I create multi-photo prints and collages in iPhoto?

I've been trying to do that for about 2 years.  I did it once, by accident, and couldn't ever do it again. The only other way I could figure it out was to 'create' a card, but I could only print it, not save it or send it out to print elsewhere.  I was fortunate enough to get connected with an iPhoto expert. He knew exactly what I wanted to do.  He also told me I wasn't far off from the way I was doing it.

First, to create a multi-photo collage, you do it by using the templates available when creating a Book.  He recommended using the Photo Book or Photo Essay, but play around with all the different options.   Once you've selected the design, you'll see all the page templates on the screen. Play around with the page templates, then go to Layout to choose the number of photos you want to use. The template will re-populate for that amount of photos! Also, if you know you need x amount of 2x2 or 2x3 photos (for example), you can manipulate the template by changing the amount of photos on the page.   You can change the size of the paper to print to accommodate this as well. (if you want to be fancy, play with the 'options' and also all the color palettes and type options at the top)

Second, to save, upload or print your project, take a screen shot of the selected area!  Brilliant!  But before you do that, go to the zoom in the lower left corner and zoom in your project on the screen as much as you can and make sure the navigation tool is not hovering over your project. Use Shift+Command+4 and a crosshair will appear. Click & drag that over the area you want to print.  When you release, the project is automatically saved to your desktop. Drag it in to iPhoto and you now have a .jpg to print in what ever size you need!

This is what I did at the Apple store just playing around.  I constrained this photo to print as an 8x10. You can see I forgot to remove the zoom tool and unclick the bottom right photo.

This is a 4x6 I created in Book using a colored background


I played around some more today and found that if I want to print 2x3s or 3x4s on one 4x6 photo, it is easier to create it in Card, not Book.  All the Layout options are still there. It's already set in the correct aspect ratio to a 4x6 print and less editing is necessary.  Book is better for a multi photo collage, or for larger prints.


Here are step by step instructions
1. Select your photos
2. Click the Create button and select Book
3. Select Design of book
4. Go to Layout, choose number of photos
5. Create photo collage using template
6. Zoom into collage
7. remove all tools from screen shot area
8. Shift+Command+4 to take screen shot 
9. Import into iPhoto

Yes, it's a "work around", but it's also putting iPhoto to work for me in a different way.  I'm so excited to be able to do this!  


Bath Time Bliss

Alrighty! I'm home from vacation, the family visitors have gone, so, I am finally back in my scraproom.  That means a new LO to share.

Oh, but first some fun news to share.  You know that fun new challenge site I've been mentioning, Childs Play Challenges? Well, I'm excited to be joining their design team beginning in August!  I hope you'll join in on the fun over there.  I think the challenges are very inspiring and easily adaptable. They should appeal to a lot of you!

Back to my LO.  Well, this is for Childs Play Challenges, inspired by good, old fashioned, Watercolor Paints.  There are a few things here that came form the paints.  The photos are of my younger son in the bath (water), the blue glitter circles are like the shape of the paints, and the clear beads are like droplets of water. Then there is the literal paint splatters as well.

I tried something new on this LO.  A while back I saw a demonstration using a Glue Pad and glitter. Well, I recently bought a glue pad thinking I would use my stamps and glitter.  That's what I did here.   The 2 sizes of circles were stamped with the glue pad, with glitter applied afterwards.  You might just be seeing glitter on my pages more often.

Let me in!

Saturday, June 30, 2012

If you are looking for the Independence Day Blog Hop, please go here.


Ooh, there are so many other things I should have been doing but I needed some down time.  So, up to my room I went.  45 minutes and Poof! A new LO.  This one is another fun idea from Child's Play Challenges!  This idea is based on sidewalk chalk. Well, that's something my son has never been interested in.  But oh well.  I have these cool chalkboard alpha stickers that I could use in a title.  And Oh, I have these awesome photos of him trying to get back into the classroom after meeting his teacher.  He really didn't want to leave.  I had to drag him kicking and yelling OUT of the classroom.  He turned around and starting banging not he door to get back in.  His teacher poked her head out to ask if everything was ok....

I had a chance to play with a new chevron mask by Studio Calico.  The blue Glimmer Mist and Doodlebug twine pick up the blue in his shirt.  The big Basic Grey red brad,  Echo Park PP and red question ,ark pick up his red shirt and the red door.  Definitely fun and a great way to use these alpha stickers!


Fun on the 4th

Thursday, June 28, 2012

Welcome to the Independence Day Blog Hop.  If you didn't get here from Robyn's blog, go back to Amanda's blog and start from the beginning.

I love the Fourth of July.  I'm a history buff, so the significance of the day itself is important.  Everything is red, white and blue! But I also like a good reason to spend the day with the family doing something fun.

I  didn't have a lot of 4th of July photos printed, but I did have this one.  It's from a few years ago, and the coldest 4th I can remember.  We wore long sleeves all day.  It was cloudy.  We weren't sure we'd be able to see the fireworks.  It's a good thing there were Sparklers and Screamers!

I used a sketch by Lain Ehmann and kept it fairly simple.  I do have to say though, that I'm really enjoying making pinwheels lately.  They were the right accent for this page.  I fussy cut the small ones on the banner from the PP and made the larger ones.    I used red buttons to pick up the the red "4th" (which I made from a sheet of Thickers numbers). 

Supplies: PP-Best Creation and MME, Twine-Doodlebug, alpha letters/numbers-Thickers, Cosmo Cricket, Melissa Frances, random buttons.

Thank you for stopping by.  Hope you enjoy a fulfilled and safe Independence Day!  Please head on over to Mandi's blog from here.

***C*O*L*D***

If you are looking for Child's Play Challenges Design Team entry, please go here.

Good Thursday morning!  You know what that means...Thoughtful Thursday at Thinking*Through*Design.  Today's thought is about grounding photos.  I have to say, I am learning as I go along here.  I don't think I gave much conscious thought to what I was doing to make my photos stand out on my pages.  I did realize while working on this LO, that my photo was getting lost on the page.  It was too close in color to the PP.  Aha!  I needed something to make the photo stand out, to ground it.  I chose a transparency with a framed edge in a darker, brighter color.  Now the photo is the focus.

 I do want to share that I almost ruined the whole page.  I tried to splatter some ink and it didn't come out right. I used a paintbrush to smear it around and it looked worse.  I added some watered down white paint then misted with white and was able to make it look frosty.

Popcorn Passion

Sunday, June 24, 2012

Ohhh, I'm really excited about this page. It's my Design Team entry for Child's Play Challenges. I recently found this challenge site and am having so much fun playing along.  Oh, how the prompts are taking me back.... Anyway, it's great for me to be able to grab inspiration from any part of the prompt and run with it.  I really work well that way.  I think these challenges are made for me.  I can be silly and serious at the same time.   Wish me luck!   The inspiration for this entry comes from this photo:


I'm sad to say, my children are way past this toy.  I took some time to decide how I was going to approach this.  I thought about color.  Then I thought about circles.  Then I thought about the sound the toy makes.  *POP* *POP* *POP*!!!  Yup, my LO is inspired by the sound this toy makes as it's rolling across the floor.

This LO makes me giggle, and for a few reasons.  First, the photos.  My son had so much fun discovering, playing with and eating the popcorn.  Second, this piece of Basic Grey popcorn paper!  When I saw it in the paper pack, I thought to myself, "nah, I'll never use this".  Never say never.  I couldn't have asked for better paper.  Combine those two with the pop-pop toy and there you have the giggles.

I fussy cut some of the popcorn, used pop dots and some small beads to give the effect of the popping sound.  I used some of the colors (red, blue, yellow, white) in the toy as well and outlined the blue circles on the PP to replicate the popping balls in the toy.  I replaced the 'O' with a piece of popcorn, again to replicate the sound and the action of the toy.  Thank you again Child's Play Challenges, for another fun inspirational idea.

Tree Hugger

Thursday, June 21, 2012

Ahhh, a day to myself.  That always means scrap time.  I didn't plan on creating this page today. I was looking for some other photos and came across this one of my son in the tree.  As I was looking through this paper pack, I saw the large tree sticker on the page.  Club Ck May/June Issue Challenge #8 is using a tree element on your page.  Since it accidentally fell onto my desk, I went ahead with it.  Let me tell you, it is not what I had planned on for this challenge.  None the less, I am very happy with the way it looks.  I like the subtle colors and the simple design.  I probably never would have used this sticker if it wasn't for this challenge.  Thanks again CK for pushing me outside my box.


PP/sticker-Basic Grey, fabric border-LYB, twine-Doodlebug, Chipboard pieces-MME, letters-Thickers, ink-colorbox, pen-EK Success

When the Wild Things Come

Tuesday, June 19, 2012

Yup, another 2 pager! Thanks again to Child's Play Challenges!  The inspiration for this page comes from the book, Where the Wild Things Are by Maurice Sendak.  I had to think hard about the photos I would use.  I have a stack of photos on my desk that I pull from when I scrap.  I try really hard to use those first, before I print others.  When I looked at these Halloween pictures, I actually giggled to myself.  What could be better than Wild Things and Halloween?


My guys weren't scary, but they sure were little monsters!


I adapted a Scrapbook Generation sketch for this LO.  All PP and stickers are BoBunny. Flag banner, SEI. Title stickers, MakingMemories and Thickers, Souffel pen.  I added some Stickles to the eyes.


2 Page Frenzy

Monday, June 18, 2012

I've been on a roll lately creating 2 page layouts.  It's been fun to get so many photos scrapped so quickly. While working on them, I've found I take a more simple approach.  Less is more.  With more photos on the page, there is already a lot going on.  Since I want to focus on the photos, I find myself using fewer embellies and simpler designs.  When working on single page layouts with less photos, I have more room to 'play'.

Here are 2 that I finished last week.  Both are definitely more simple.

 
This was our fist time going to an Apple Orchard/Pumpkin Patch.  We all had a great time.  It was a beautiful, warm, fall day.  We picked apples, chose our pumpkins and snacked on fresh pressed apple cider and apple donuts.  We decided to make it an annual event.

I stitched to make it look like the pumpkin vines.  I only had 2 pumpkin stickers, so I dry embossed the negative space of one of them and cut it out to make the third.


 We were visiting my Mom.  In her front yard is this huge Coral Tree.  Evan sat there for hours reading Calvin and Hobbes comics.  I see the Calvin and Hobbes font for the title. Sketch by Scrapbook Generation.

A Disney Date

Saturday, June 16, 2012

Yippee, back to regular blogging!  I found this great new calling site called Child's Play Challenges.  The challenges are based on children's books, toys, games etc.  How fun!  I like it because I can choose any element from the item for my inspiration.  I think that really works for me and the way I scrap.
This is my first LO for Child's Play Challenges.  Here is the inspiration photo:

and here is my LO

I have already finished scrapping all my photos of my boys in their Cozy Coupe, so I took my cue from the colors in the photo, red, yellow and blue with a bit of black. I had these photos of my older son and I at Disneyland.  The red shirt and blue balloon were easy to work with.  I love primary colors, and having boys, I use them frequently. I spent a lot of time making the pinwheels.  Iused them because they move like the cozy coupe!

I started with a Scrapbook Generation sketch.   DCWV Cardstock, Echo Park and TPC Studio patterned paper, Doodlebug twine, random buttons and Authentique letter stickers.


FREE BLOGGER TEMPLATE BY DESIGNER BLOGS